Answer: Use an unscaled mode when dimensions must be preserved, and Fit when keeping all content inside the printable area matters more than exact size. Check the preview and a measured proof.
On this page
Print Use Lab editorial project · Updated October 21, 2026 · Original decision framework and illustrative example. No physical product measurement or hands-on benchmark is claimed.
Why the distinction matters
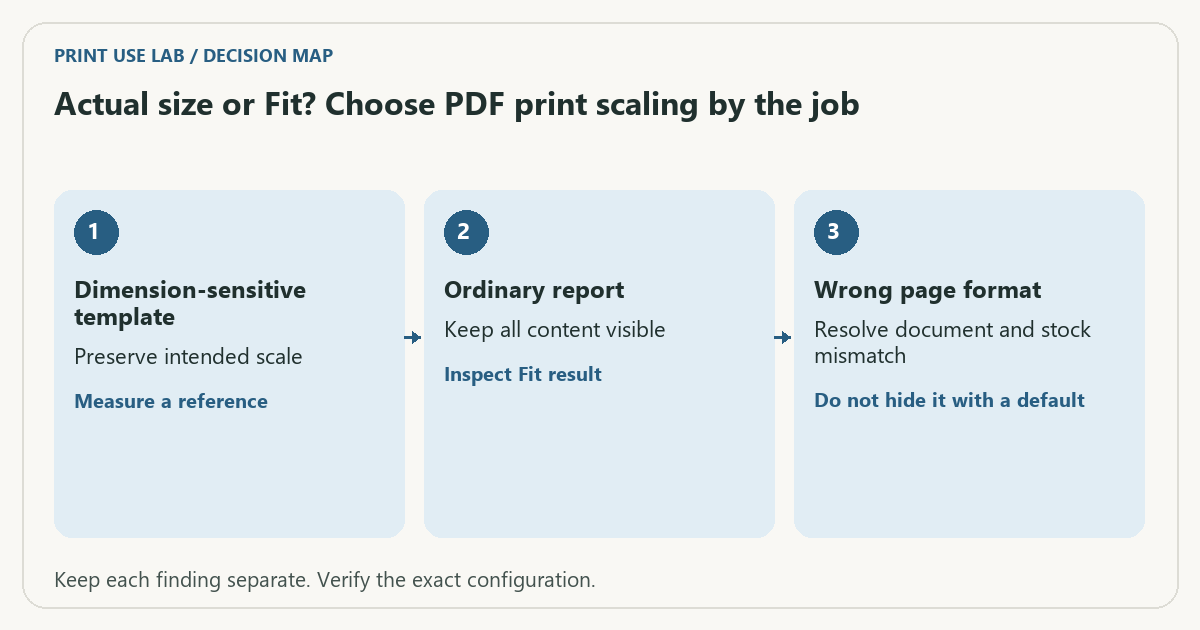
An application’s Fit option may shrink or enlarge a page. Actual size requests no scaling, which can crop content that lies outside the available area. Neither option repairs a source designed for the wrong paper size. Decide what success means before selecting a mode: a readable report, an accurately sized pattern or a label template have different requirements. Use the exact printer’s supported paper and margins.
A practical sequence
- Read the PDF page dimensions and compare them with the loaded sheet.
- Decide whether exact physical scale or complete visible content is the priority.
- Choose the application’s appropriate mode and inspect the entire preview.
- Print one supported test and measure a known reference when dimensions matter.
Decision record
| Check | What it means | What to verify |
|---|---|---|
| Dimension-sensitive template | Preserve intended scale | Measure a reference |
| Ordinary report | Keep all content visible | Inspect Fit result |
| Wrong page format | Resolve document and stock mismatch | Do not hide it with a default |
Worked example
A hypothetical 100 mm reference printed at 96% becomes 96 mm. That may be harmless in a reading copy but unacceptable in a cutting pattern. A label that drifts progressively down the page can also reflect scaling, so check size before applying an offset.
Verify the result
Save the paper, application and scaling choice as part of the job record. Different programs may use different defaults. A screenshot of a 100% setting is useful, but the measured printed reference is the evidence for the finished size.
Download the editable CSV worksheet · Print-job workbook
Question and answer
Does Fit always make the output smaller? It can enlarge or reduce depending on the source and available area. Check the application’s definition and preview.
Sources and scope
- Adobe Acrobat: page sizing for print — Distinguishes scaling modes. Printer margins and supported media remain model-specific.
The decision sequence, diagrams, worksheet and worked case are our editorial work. AI assisted research, drafting and implementation. Official references support the named technical distinctions; examples do not establish real product performance.
Continue the task
- US Letter, Legal and A4: dimensions and print setup
- Set a custom paper size without confusing stock and artwork
- Browse the complete resource library
Download a two-axis scale control
Download the Print Use Lab scale-control PDF (two pages: A4 and US Letter). Print only the page matching your paper. Each page has perpendicular 100 mm references, position marks 20, 100 and 180 mm from the left edge, and a place to record the actual job settings.
Open the saved PDF in your PDF application. Select the matching sheet size, one page per sheet and 100% or Actual size. Disable Fit and borderless expansion for this diagnostic. Adobe documents that Fit can shrink or enlarge the page, while Shrink oversized pages only reduces oversized pages. Controls and names vary; inspect both the application and the printer-driver dialog. Adobe: page-size controls.
Measure between the centres of the two end marks, not the outside edges of the ink. Record horizontal and vertical lengths independently. A 97 mm result on a 100 mm reference means a measured output ratio of 0.97 on that axis. It does not identify whether the application, driver, borderless mode or feed caused the change.
If the horizontal reference is correct but the vertical one is not, a single percentage change cannot make both correct. If both lengths are correct but the three position marks are displaced by the same amount, investigate page placement rather than rescaling. Do not compensate for a drifting feed with a guessed global template offset.
Repeat one plain-paper proof after changing one setting. Use the Label Alignment Diagnoser to compare the position marks. Confirm the actual label stock separately: this sheet does not prove feed compatibility, adhesive safety or print margins. Retain the successful PDF, application version and driver settings with the job.
Digital checks: page boxes, vector dimensions and SHA-256 checksums · generation and verification script. The script requires Python, ReportLab and pypdf. The files were generated on November 9 and published after review on November 10, 2026. These are digital checks, not physical printer tests.
Build on what you just learned
Your next useful step.
Proof the page, binding edge and reading order.
A filled PDF prints blank fields: check the saved file and print layers
Save and reopen the filled PDF, then inspect the print preview and the viewer’s form/comment options.
Read the guide →Duplex printing: automatic, manual and binding-edge differences
Automatic duplex prints both sides without asking you to reload the sheet. Manual duplex requires a documented reinsertion step. Neither feature tells you whether…
Read the guide →